Showing posts with label tack. Show all posts

Sunday, 25 September 2016

Bridle update and a bit of a trial!

Just a quick update on the bridle progress....its been painfully slow mainly due to me working on it in the evenings and realising my eye sight for super fine detailed work isn't what it used to be! (I'm adding a magnifier/light onto my wish list lol).


A lot of time was spent on the bit and after gluing and regluing more times than I care to remember it got to the messy stage and still wasn't staying together ~ I had been using a resin epoxy glue which took too long to cure. I have just been out and got a different quick setting super tough super glue which I'm hoping might mean I can try to make a gag bit like the original picture.


 Apart from struggling to make the bit and the buckles I've really been enjoying the bridle process even if I could have made several full sized versions by the time this is done! The rope front came out pretty much spot on how I wanted it to, it was made from garden twine which was covered in a layer of resin then nail varnish to make it hold its shape and stop it from fraying.


Ignore the headpiece sticking out, as you can see its lacking the cheek-piece and reins. If there is one part I am particularly happy with is the flash connector, I didn't hold out much hope in making this and it staying in one piece but its turned out a treat!

Sunday, 18 September 2016

New project and new horse!

Part 2 of my exciting post was this Classic sized Gammon jumping model by Lynn Fraley who arrived during the week. Although saying you've just taken delivery of a new horse imported from the States is much cooler than saying I've just got my plastic horse lol.  He's lovely and although he does have some small dings and could use some touching up, I'm really happy with him and love the sculpting on the model (apologies for the pics, one handed camera phone shots again I'm afraid).


I finally had some time this weekend to get started on making a bridle for him ~ these are pics just figuring out the length and gauging strap width, which are done with low tack tape. If you notice the gap on the noseband its because I chose a noseband with a rope insert (see the pic below showing the inspiration shot I found in a magazine). I found it handy to use a real pic for reference not only in deciding what to make but also as a guide on how wide to make the straps.


The real horse is wearing a gag bit but I fancied making my own three ring snaffle, sadly I'm not too clever at soldering so I am trying to use resin glue. I'll let you know how it holds up. Pic below shows what I'm aiming for with the bit, the brass ring was something I had lying around and its not far off the size of the three ring when you add the top loop into the equation.


I've just spent the last few hours cutting out the leather using the tape as a rough guide and deliberately cut the lengths of the straps on the tape longer than I will need as there needs to be a little extra to account for the leather being thicker than the tape and also its easier to cut a strap down if its to long but impossible to lengthen if its cut too short. Valegro photo bombed and is showing off the leather I'll be using for the keepers. 


Just a quick tip ~ the ends on a riding bridle should traditionally have bridle points (see pic below) which basically means taking a small wedge which narrows the point down to make going through keepers easier.  In-hand bridles and driving harness always have egg points on the end of the strap which are unsurprisingly cut the same shape as the top of an egg.


Friday, 9 September 2016

exciting post day & book review

I have had some amazing packages this week and this is one I have been after for years. Technically I already have one but its currently in Sweden (and has been for more years than I care to admit too! the joys of getting older) with my college roommate who 'borrowed' it for a while.


Its called 'Side-saddle riding for beginners' by Charlotte Brailey Kneeland and illustrated by Jan Olson Floyd. Its produced by the International Side-Saddle Organisation who are the people I approached in order to locate the book again (having a memory less impressive than a goldfish with Alzheimer's) I could not for the life of me remember who wrote it or the title, so gave the lovely lady who runs their online shop a long winded description of the book and fortunately she figured out the one I meant and had one available.


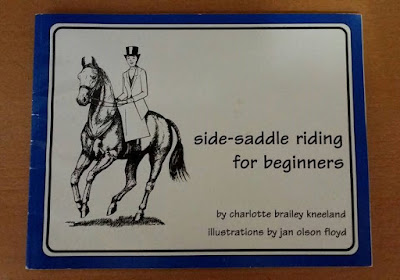
A paperback book abut A4 size on its side 64 pages long and is stuffed full of the most wonderful, clear and easy to understand line drawings which is a godsend if you want to have a straightforward and no-nonsense explanation of a side saddle. It doesn't faff around either with the history aspect, this book covers the basics showing the parts of the saddle from the offside, nearside, underneath and aerial views. How to find the correct fit for the rider, for the horse and how it should look and common fitting faults.  It goes over how to girth up correctly and the difference between the most popular side saddle makers saddles.  It also clearly shows the different types of safety stirrups and what girths to use.  Then onto the riders position, common faults and how to correct them and a great series of drawings illustrating the habit and how it works plus what is expected from a turnout in a show class (covering American style and UK). Finally it has several pages listing side saddle reference books which is very handy.


I have several side-saddle books and just find this one the best for concise accurate explanation, other books will go more into how to ride side-saddle where this one concentrates on getting essentials correct like fit etc. I can see this book being a real boon for people wanting to do some performance classes with their model horses.


  I don't feel its right to share pics of the pages inside (apart from obvious copyright issues) the authors have done a good job and its well worth finding a copy but I have included pics of the front and back cover so you know what to look for.  Here is a link to the place where I got my copy from
http://www.thesidesaddlery.com/