Saturday 1 July 2017

Western Saddle....first attempt

I'm the kind of person that likes to make life harder than it should be....for example making a western saddle for the first time I went for a stablemate scale. The theory is if I can manage to make a half decent one in this scale it will be easier in littlebit/classic scale (I don't have space for trads)! 

This is my smallest resin, very much 32nd scale and ideal for a silver show saddle. First off I made the tree using styrene plastic and the seat with magic sculpt.

Working on patterns, which were done like the gammon bridle using low tack tape before cutting the leather 
Showing the leather and pattern pieces, the weird contraption the seat is sitting on I made to have a stable base when molding the seat with apoxie

Checking the fit on the model after covering the seat. The seat leather is a lighter colour to the rest but interestingly in this scale its hard to see the difference. Of course the bad phone photography doesn't help!

First decorations in place which aren't glued but pinned in place with super fine wire embedded in the epoxie and then guilded with silver.

Seat is just placed on top checking the design and fit at this stage

First fit of the seat jockey

All the silver done and ready to assemble the two half's. I had planned on looping the fenders through the saddle tree slots but decided it would add unwanted bulk.

Glueing in place....modelling balloons moulding the saddle to the horses shape 

There's a scrap of rubber under the panels to stop scratches and glue getting on the model

Whoop! Looks like a saddle 

Does my butt look big in this??!

Forgot to take pics of the stirrups being made, the fenders are adjustable 

So cute, I'm happy that using all the new processes worked out as I'd hoped 

Lighting was awkward but this is more the actual colour

So chuffed....

I'm planning on making it into a parade set eventually

I have some curio resins I'll try the saddle on which i will take pics of. currently working on saddle pads. All in all a very satisfying project. The thing I'm most happy with is the saddle sits into the shape of the horses back nicely, it doesn't sit too high. 


Sunday 18 June 2017

as predicted....

I suck at blogging!  though to be fair to myself 2017 started off rather stressfully with things like noro virus, a cancer scare and a lorry crashing into my building.  Now back on track and making things again all be it at a snails pace. 
I started making a 1/32nd scale western saddle tree and this happened....


I get so distracted when I get into a project lol....classic scale for the gammon resin


fairly chuffed with how it turned out, and learning to use styrene and do the guilding was loads of fun. Its pretty much done minus flowers at the base plus flags & number.  update on the bit situation...total fail lol, glue didn't hold so I will have to try soldering eeeeeeeeeekk!  I have also been having a go at customising a resin which I will do a post on soon. 


Sunday 25 September 2016

Bridle update and a bit of a trial!

Just a quick update on the bridle progress....its been painfully slow mainly due to me working on it in the evenings and realising my eye sight for super fine detailed work isn't what it used to be! (I'm adding a magnifier/light onto my wish list lol).


A lot of time was spent on the bit and after gluing and regluing more times than I care to remember it got to the messy stage and still wasn't staying together ~ I had been using a resin epoxy glue which took too long to cure. I have just been out and got a different quick setting super tough super glue which I'm hoping might mean I can try to make a gag bit like the original picture.


 Apart from struggling to make the bit and the buckles I've really been enjoying the bridle process even if I could have made several full sized versions by the time this is done! The rope front came out pretty much spot on how I wanted it to, it was made from garden twine which was covered in a layer of resin then nail varnish to make it hold its shape and stop it from fraying.


Ignore the headpiece sticking out, as you can see its lacking the cheek-piece and reins. If there is one part I am particularly happy with is the flash connector, I didn't hold out much hope in making this and it staying in one piece but its turned out a treat!

Sunday 18 September 2016

New project and new horse!

Part 2 of my exciting post was this Classic sized Gammon jumping model by Lynn Fraley who arrived during the week. Although saying you've just taken delivery of a new horse imported from the States is much cooler than saying I've just got my plastic horse lol.  He's lovely and although he does have some small dings and could use some touching up, I'm really happy with him and love the sculpting on the model (apologies for the pics, one handed camera phone shots again I'm afraid).


I finally had some time this weekend to get started on making a bridle for him ~ these are pics just figuring out the length and gauging strap width, which are done with low tack tape. If you notice the gap on the noseband its because I chose a noseband with a rope insert (see the pic below showing the inspiration shot I found in a magazine). I found it handy to use a real pic for reference not only in deciding what to make but also as a guide on how wide to make the straps.


The real horse is wearing a gag bit but I fancied making my own three ring snaffle, sadly I'm not too clever at soldering so I am trying to use resin glue. I'll let you know how it holds up. Pic below shows what I'm aiming for with the bit, the brass ring was something I had lying around and its not far off the size of the three ring when you add the top loop into the equation.


I've just spent the last few hours cutting out the leather using the tape as a rough guide and deliberately cut the lengths of the straps on the tape longer than I will need as there needs to be a little extra to account for the leather being thicker than the tape and also its easier to cut a strap down if its to long but impossible to lengthen if its cut too short. Valegro photo bombed and is showing off the leather I'll be using for the keepers. 


Just a quick tip ~ the ends on a riding bridle should traditionally have bridle points (see pic below) which basically means taking a small wedge which narrows the point down to make going through keepers easier.  In-hand bridles and driving harness always have egg points on the end of the strap which are unsurprisingly cut the same shape as the top of an egg.


Saturday 10 September 2016

Obsessive compulsive box buying

Is there such a thing?....well I have it bad, I never seem to be able to go into Hobbycraft without coming out with some form of storage box. (if the Really Useful Box Company ever want to sponsor me then I'd be delighted!)


Beginning of the week I went into the city to meet my Dad at the station for meal and afterwards went into the craft store to look for a small craft cutting mat, of course I didn't make it out without getting some extras.


A larger clip box for leather scraps and a tool overflow storage plus I found some great curved flat nosed mini jewellery pliers and my ultimate find in the decoupage section ~ tiny spring sissors and a swivel knife with the teeniest blades which I'm hoping will work wonders for tooling. 


I went for the finger type where you can get better control over the blade and is closer to the swivel knifes favoured by leather carvers ~ xcut did a straight small bladed swivel knife but I think it will be easier to get a smoother cut with the fiskars.  I can't wait to try them out!


Friday 9 September 2016

exciting post day & book review

I have had some amazing packages this week and this is one I have been after for years. Technically I already have one but its currently in Sweden (and has been for more years than I care to admit too! the joys of getting older) with my college roommate who 'borrowed' it for a while.


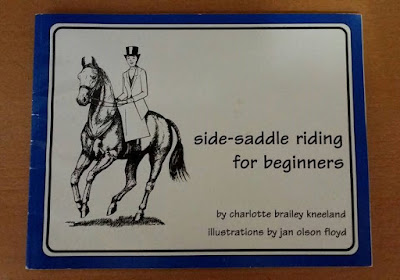
Its called 'Side-saddle riding for beginners' by Charlotte Brailey Kneeland and illustrated by Jan Olson Floyd. Its produced by the International Side-Saddle Organisation who are the people I approached in order to locate the book again (having a memory less impressive than a goldfish with Alzheimer's) I could not for the life of me remember who wrote it or the title, so gave the lovely lady who runs their online shop a long winded description of the book and fortunately she figured out the one I meant and had one available.


A paperback book abut A4 size on its side 64 pages long and is stuffed full of the most wonderful, clear and easy to understand line drawings which is a godsend if you want to have a straightforward and no-nonsense explanation of a side saddle. It doesn't faff around either with the history aspect, this book covers the basics showing the parts of the saddle from the offside, nearside, underneath and aerial views. How to find the correct fit for the rider, for the horse and how it should look and common fitting faults.  It goes over how to girth up correctly and the difference between the most popular side saddle makers saddles.  It also clearly shows the different types of safety stirrups and what girths to use.  Then onto the riders position, common faults and how to correct them and a great series of drawings illustrating the habit and how it works plus what is expected from a turnout in a show class (covering American style and UK). Finally it has several pages listing side saddle reference books which is very handy.


I have several side-saddle books and just find this one the best for concise accurate explanation, other books will go more into how to ride side-saddle where this one concentrates on getting essentials correct like fit etc. I can see this book being a real boon for people wanting to do some performance classes with their model horses.


  I don't feel its right to share pics of the pages inside (apart from obvious copyright issues) the authors have done a good job and its well worth finding a copy but I have included pics of the front and back cover so you know what to look for.  Here is a link to the place where I got my copy from
http://www.thesidesaddlery.com/

Sunday 4 September 2016

Ground Zero

Saddle numero uno!  I blame getting inspired by some of the fantastic model tack artisans amazing creations for having a bash at making this over a year ago, so many fabulous examples are out there of people who's skills are otherworldly in replicating leather work in minute scale.


This was made while I was waiting for a client to collect some repairs after normal hours and had a bored/inspired moment playing around with some off cuts of leather and the metal from a quiche tin! I wanted to try and make a typical UK style show saddle ~ in my mind I had the saddle I had for my Highland pony (a native pony saddle company working hunter/VSD saddle) as the basic theme but I didn't use any reference pictures just remembering that particular saddle, considering this I'm pretty happy with the outcome. I also didn't have a specific scale in mind I simply cut the metal flan tin to a size that appealed and went from there.


As it turned out to be pretty much spot on Classic scale, it has three girth billets both sides which are stitched through the 'tree', I decided at this scale my stitchmarkers and over-stitch markers would be out of scale to add stitch marks (at some point I will post about my saddle making tools and bore the pants of you with my nerd like enthusiasm for tools!). Instead of the markers I went for a crease line where the stitches would go.  I'd like to get a pounce wheel and see if that would work in scale better but I think it might be too large for littlebit/stablemate size which is what I want to try next.  I used teeny tiny tacks for the saddle nails which I got from Hobbycraft which worked pretty well, its riveted in place through the skirt, flap and makeshift tree.


Things I would alter and try to improve on are more numerous than the good points ~ some of the bloopers are:


  1.  the makeshift flan tin tree worked ok-ish but needed to have more time taken over getting the basic seat shape sorted prior to covering with leather ~ you can see the sweep of the seat as it bends up into the cantle is too clunky and there are ridges where the metal bends laterally where the riders seat bones would be. All this can be remedied with careful filling and prep to get the seat perfect.
  2. I skived the skirts a fraction too thin, you can see the stirrup 'bars' (which are gold covered wire bent into an oval)
  3. the aforementioned bars are too tricky to access....I should have made the stirrup leathers before covering and had them attached before covering with the skirts.
  4.  going back to the 'tree' its not symmetrical enough ~ notice the squared off cantle is fractionally nearer to the skirt on the nearside than the offside for a start, it makes the whole seat look a tiny bit twisted.
  5. the holes for the girth billets where made with an awl not the super idea of using a mechanical pencil
  6. the panels are too thin at the back (it was 'flocked' with the inside part of a plaster from my first aid kit...as you do lol!) 
  7. also the panels don't have enough of a gullet between them, in real life it wouldn't be fit for purpose as it would press on the spine.
  8. definitely need to be more careful applying glue ~ you can just see some especially at an angle on some of the seams.


that's the major boo-boos and the main points I want to alter next time ~ I did leap in a make the seat for another saddle (littlebit-ish scale this time....a teaser pic here showing the working hunter saddle and saddle number 2 in the clip tubs I use to store them in). On reflection I should have again spent more time modelling the seat which is why its spent a year in the box. But I will finish it and learn from the experience of making a saddle for another discipline. The main thing I took from making the saddle was I really enjoyed it and mainly loved a new challenge plus for a first attempt I'm pretty happy with the overall effect.


As for whether this saddle number 1 would be live show quality? I have no idea, although I'm happy with how its held up after a year (pics are taken one year on and on my phone apologies for the quality)....I've never been to a live show sadly, one day I will (its on the bucket list) and hope to find out but I'd love to know what folks think of whether it would be near the mark.